Instruments in Structural Lab
Structural Lab:
Structural lab contains all the apparatus and facilities needed for teaching purposes and researches.
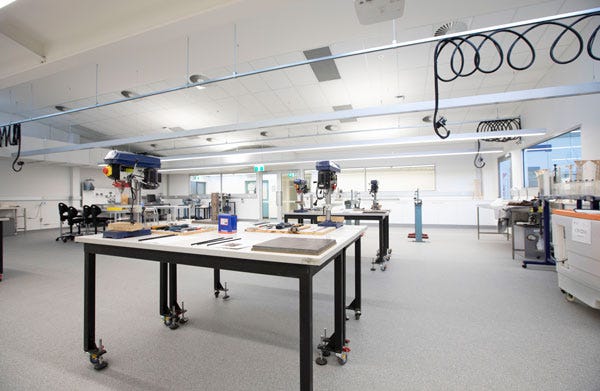
Poker Vibrator:

a) Types:
Poker vibrator is usually of 4 different types:
i. Internal vibrator
ii. Form vibrator
iii. Surface vibrator
iv. Vibrating tables
b) Purpose:
Poker vibrator is ideal for internal compaction of concrete specimens. Vibrating is an important step in concrete construction projects. Freshly poured concrete can have hundreds or thousands of air bubbles, which can reduce the strength of concrete structure. Poker vibrator shakes or vibrates vigorously and eliminate air bubbles from freshly poured concrete.
c) Standards:
EN-12390–2
ASTM C31
ASTM C192
d) Parts of Instrument:
i. Drive unit electric version
ii. Drive unit petrol version
iii. Supply cable
iv. Switch
v. Carrying handle
vi. Locking bolt
vii. Coupling
viii. Flexible drive
ix. Flexible shaft
x. Pendulum
xi. Poker head
e) Limitations of Instrument:
It there is low workability of poker vibrator, the over vibration causes additional power consumption, resulting in energy dissipation. The main limitation of poker vibrator is the noise it produces.
f) Personal observation about the instrument:
The driving shaft of drive unit drives the flexible shaft. The flexible shaft drives the pendulum inside the poker head and creates a vibrational movement. The poker head is sticked inside the concrete vertically to remove air bubbles from freshly poured concrete.
Melting pot:

a) Types:
It has different types based on the nature of melting material such as for concrete, wax and paraffins etc.
b) Purpose:
It is used to melt the capping compound, paraffin and other materials. It is also used to melt the capping compound for concrete cylinder capping and to melt the wax to seal the soil samples and other materials.
c) Standards:
ASTM C321
ASTM C579
ASTM617
AASHTO T231
d) Parts of instrument:
i. Aluminum container
ii. Well lagged steel jacket
iii. Cover
iv. Thermostatic control to control the temperature
e) Limitations of instrument:
Melting pot can work only at specific temperature. Thermostatic control can control the heat within the given range but this range cannot be exceeded.
f) Personal observation about the instrument:
In melting pot the temperature is set and maintained at a desired value. It is used for melting capping compounds such as sulphur and other materials.
Vicat Apparatus:

a) Types:
Modified forms of vicat apparatus are introduced but they all work on same principle hence there are not any specific types of vicat apparatus.
b) Purpose:
It is used to determine the setting time and consistency of cement and mortar pastes. Modified vicat apparatus is designed for testing of gypsum and monitoring of plaster paste.
c) Standards:
ASTM C187
EN 196–3:2005
BS 4550
AASHTO T131
d) Parts of instrument:
i. Initial-set needle
ii. Consistency plunger
iii. Moveable rod
iv. Graduated scale
v. Vicat mould
vi. Glass plate
vii. Thermometer
e) Limitations of instrument:
The method of using vicat apparatus is invasive and it results in high variability in measurements.
f) Personal observation about the instrument:
Vicat apparatus consists of an arrangement to hold the plunger of 10 mm diameter and two other needles which are made to freely fall into a mould filled with the cement paste and the amount of penetration of the needles of plunger can be noted using the vertical graduations from 0 mm to 50 m.
Kelly ball apparatus:

a) Types:
There are no specific types of Kelly ball apparatus.
b) Purpose:
Kelly ball test also called as a ball penetration test is performed on freshly mixed concrete to measure its workability. It is a quick simple field test.
c) Standards:
ASTM C360
d) Parts of instrument:
i. Metal ball
ii. Handle
iii. Graduated stem
iv. Frame
e) Limitations of instrument:
The test sample of concrete should be levelled to perform Kelly ball test. A large amount of sample is required. This test may not give accurate results when large size coarse aggregates are used in concrete.
f) Personal observation about the instrument:
This apparatus can be used in field and it is quicker and precise. The workability of concrete is the average value of all the readings obtained. Workability of concrete = Ball penetration value = Average of all the readings obtained.
Flow table:

a) Types:
i. Manual flow table
ii. Motorized flow table
b) Purpose:
A device for measuring the consistency of freshly made concrete or mortar consisting of a table top that can be raised and dropped and a mold for shaping the test specimen. It is also used for preparing mortars of standard consistency for testing.
c) Standards:
BS EN12350
d) Parts of instrument:
i. Metal cone or mould
ii. Handle to lift the flow table
iii. Tamping rod made of hardwood
iv. Mould placed at center of table
e) Limitations of instrument:
The flow table test procedure does not represent actual placement conditions. The results are not given in terms of fundamental units. An analytical treatment of the test would be difficult.
f) Personal observation about the instrument:
Flow table is a simple instrument and can be used in field. Flow table test provides a quick result. Flow table measures the horizontal spread of a concrete cone after being subjected to jolting.
Capping plate:

a) Types:
i. Square glass capping plates
ii. Core capping plates
b) Purpose:
Steel capping plate, used for capping concrete blocks up to 500x300 mm.
The plate surface is accurately machined.
c) Standards:
EN 12390 3
ASTM C617
AASHTO T23
AASHTO T126
d) Parts of instrument:
i. Cylindrical capper
ii. Ladder
iii. Cylindrical carrier
e) Limitations of instrument:
If more load is applied the plate will break. When the cross section of the plate is not uniformly and fully loaded it will result in the uneven stress distribution.
f) Personal observation about the instrument:
Capping plates are used on top of columns to transfer the load of beams to columns. The approximate weight of the steel cap plate is 30kg.
Air permeability apparatus:

a) Types
i. Blaine air permeability apparatus
ii. Automatic Blaine air permeability apparatus
iii. Semi-automatic Blaine air permeability apparatus
b) Purpose:
Air Permeability Apparatus is used for determining the fineness of Portland Cement in terms of specific surface area expressed as the total surface area in square centimeters per gram of mortar or cement.
c) Standards:
BS4359
EN 196–6
ASTM C204
AASHTO T153
d) Parts of instrument:
i. Stainless steel test cell
ii. Plunger
iii. Perforated disk
iv. Calibrated U-tube manometer
v. Rubber aspirator
vi. Bulb
vii. All are mounted on sturdy wood panel
e) Limitation of instrument:
Ordinary air permeability apparatus was not so accurate that’s why automatic air permeability apparatus is developed.
f) Personal observation about the instrument:
The Blaine works by drawing a definite quantity of air through bed of cement exhibiting a definitive porosity value. The number and size of the pores in a prepared bed of definite porosity is a function of the size of the particles and determines the rate of airflow through the bed.
Hardness testing apparatus:
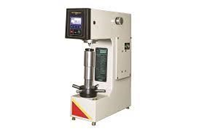
a) Types:
i. Rockwell hardness tester
ii. Macro Vickers hardness tester
iii. Micro Vickers hardness tester
iv. Brinell hardness tester
v. Universal hardness tester
vi. Portable hardness tester
b) Purpose:
Hardness tester utilizes either a steel ball or a conical diamond known as a brale and indicates hardness by determining the depth of penetration of the indenter under a known load.
c) Standards:
ASTM E18
ASTM E92
ASTM E103
d) Parts of instrument:
i. Penetrator
ii. Specimen
iii. Anvil
iv. Elevating screw
v. Hand wheel
vi. Zero adjuster
vii. Trip lever
viii. Weight pan
ix. Weights
e) Limitation of instrument:
The thickness of the specimen should be at least seven times the depth of the indentation to allow unrestricted plastic flow below the indenter. The drawback of the Rockwell test is that the indenter travel is limited to 100 Rockwell points or 0.2 millimeter.
f) Personal observation about the instrument:
Different hardness testers are used for measuring the hardness of metallic and polymer materials, small parts, finished components and case depth works.
Compacting factor apparatus:

a) Types:
There are different types of compacting factor apparatus based on different types of mould on rigid steel frame.
b) Purpose:
Compacting Factor Apparatus is used to determine the compaction factor of concrete with low, medium and high workability.
c) Standards:
BS 1881–103
d) Parts:
i. Upper hopper
ii. Lower hopper
iii. Cylinder
iv. Base
e) Limitation of instrument:
Its large and bulky nature reduces its usefulness in field. The method to perform compacting factor test requires a balance.
f) Personal observation about the instrument:
It comprises of two conical hoppers having a hinged trap door attached to the lower end of each hopper, allowing the concrete sample to flow freely into the cylindrical mould.
Impact value apparatus:

a) Types:
It has different types depending on the weight of hammer.
b) Purpose:
It is used to determine the impact value of the aggregates and select them for a given application.
c) Standards:
BS 812:112
d) Parts:
i. Lifting handle
ii. Hammer of weight
iii. Chamfer
iv. Vertical guide bar
v. Cylindrical cup
vi. Cylindrical base
e) Limitation of instrument:
Test sample must be passed through 12.5mm sieve and retained on 10mm sieve.
f) Personal observation about the instrument:
Using this apparatus is simple and it can obtain the resistance and impact of stones even in field condition.
Apparatus of super positioning:
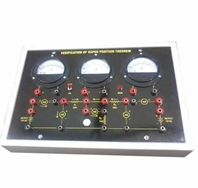
a) Types:
There is no such type or modification it is a simple theorem based apparatus.
b) Purpose and Standard it works on:
Superposition works for voltage and current but not power. In other words, the sum of the powers of each source with the other sources turned off is not the real consumed power. To calculate power, we first use superposition to find both current and voltage of each linear element and then calculate the sum of the multiplied voltages and currents.
c) Parts of the instruments:
i. Instrument comprises of Two Fixed output DC Regulated.
ii. Power Supplies of 12V & 5V at 500 mA current,
iii. Three moving coil meter.
iv. Circuit diagram Printed on the front panel & connections of Supplies.
v. Meter & Resistances brought out at 4mm Sockets
d) Limitations of the instrument:
Superposition is applicable to current and voltage but not to power. This theorem is not applicable for measuring power but it measures voltage and current. It is used in linear circuits but not used in nonlinear. This theorem is applied when the circuit must have above one source. For unbalanced bridge circuits, it is not applicable
e) Personal observation of the instrument:
The superposition theorem is simply used when the circuit includes two or more sources. This theorem is mainly used to shorten the calculations of the circuit. This theorem states that, in a bilateral circuit, if a number of energy sources are used like two or above, then the flow of current will be there at any point and it is the sum of all currents.
Vibro consistometer:

a) Types:
There are no specific types.
b) Purpose:
It is used to determine the workability of concrete based on the principle of subjecting the concrete to vibration after removal of the slump cone.
c) Standards:
BS 1881–104
EN 12350 3
d) Parts:
i. Guide sleeve
ii. Graduated rod
iii. Perspex disk
iv. Funnel
v. Rotating arm
vi. Slump cone
vii. Cylindrical container
viii. Wing nut
ix. Swivel arm
x. Base
e) Limitation of instrument:
The test procedure for vibro consistometer takes too much time.
f) Personal observation about the instrument:
This is used to measure the remoulding of concrete, i. e. changing of one definite shape to other. It is also used to find the consistency of fresh cement.
Concrete Mixer:

a) Types:
i. Batch mixer
ii. Continuous mixer
iii. Tilting drum mixer
iv. Non tilting drum mixer
v. Pan mixer
b) Purpose:
A concrete mixer mixes cement, aggregates and water and produce concrete mechanically.
c) Standards:
ASTM C685
ASTM C685M 17
d) Parts:
i. Drum
ii. Mixing paddles
iii. Motor
iv. On/ off switches
v. Power cord
vi. Ring gear
vii. Crank wheel
viii. Foot pedal locking system
ix. Frame
e) Limitation:
Concrete mixer requires proper maintenance and is difficult to clean. It requires power and is noisy. Using concrete mixer consumes more time.
f) Personal observation about the instrument:
Since mixing is done is done in machine, area is less untidy and cleaning is easy. Machine is moveable so concrete can be produced at various locations on site.
Concrete cutting machine:

a) Types:
i. Small handheld concrete saw
ii. Bigger, walk behind concrete saw
iii. Gas powered concrete saw
iv. Electric powered concrete saw
v. Battery power concrete saw
vi. Chain saw and ring saw
vii. Floor saw
viii. Wall saw
ix. Wire saw
b) Purpose:
It is used for cutting purposes of concrete. It is a power tool used for cutting concrete, masonry, brick, asphalt, tile, and other solid materials.
c) Parts:
i. Guide
ii. Engine
iii. Thickness controller
iv. Water tank
d) Limitation:
Special assistance is required to operate concrete cutting machine as it can harm people on site. If the machine breaks down it causes delay in construction work.
e) Personal observation about the instrument:
Concrete cutting machine offers superior cutting performance, sophisticated operation, long-life reliability, and optimal running speed.
Vibrating table:

a) Types:
It has different types based on the type of materials for compaction.
b) Purpose:
Vibrating tables are used for compacting stiff and harsh mixes used in precast structural members in factories and laboratory specimens.
c) Standards:
EN 12390 2
BS 1881: 108
AASHTO R 39
d) Parts:
i. Inflatable rubber mounts
ii. Speed adjuster
iii. Electric, pneumatic or hydraulic vibrator
iv. Sturdy table stand
v. Foot pad for securing table on floor
e) Limitation:
Battery powered vibrators are used but the regular supply of electricity is a problem. The batteries need to be recharged daily and exchanged after some years.
f) Personal observation about the instrument:
These are rigidly built steel platforms mounted on steel springs and driven by electric motors. The concrete is placed in moulds mounted on the platforms and securely clamped to the vibrating table, so that mould and concrete vibrate in union.
Aggregate cutting machine:
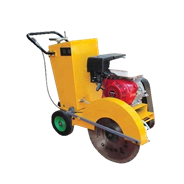
a) Types:
i. Oscillating cutting knife aggregate
ii. Laser cutting machine
b) Purpose:
An aggregate cutting device allows the user to cut the aggregate at different angles rather than the place where spindle is oriented.
c) Parts:
i. Gear box
ii. Right angle adaptor
d) Limitation:
Special assistance is required to control aggregate cutting machine because it can harm people on site.
e) Personal observation about the instrument:
Aggregate cutting machine allows to drill or cut from the side of a part instead of just from the top on a typical 3 axis machine.
Weighing balance (300kg):

a) Types:
i. Symmetrical balance
ii. Asymmetrical balance
iii. Radial balance
iv. Crystallographic balance
v. Analytical balance
vi. Micro balance
vii. Ultra-micro balance
b) Purpose:
A weighing balance is an instrument which is used to determine the weight or mass of an object.
c) Standards:
d) Parts:
i. LCD to show the readings
ii. Metallic pan
e) Limitation:
The digital weighing balance requires electricity to run.
f) Personal observation about the instrument:
Weighing balance is used to measure various measurements. They are available in a wide range of sizes with multiple weighing capacities. They are essential tools.
Concrete mixture:

a) Types:
i. Batch mixer
ii. Continuous mixer
iii. Tilting drum mixer
iv. Non tilting drum mixer
v. Pan mixer
b) Purpose:
A concrete mixer mixes cement, aggregates and water and produce concrete mechanically.
c) Standards:
ASTM C685
ASTM C685M 17
d) Parts:
i. Drum
ii. Mixing paddles
iii. Motor
iv. On/ off switches
v. Power cord
vi. Ring gear
vii. Crank wheel
viii. Foot pedal locking system
ix. Frame
e) Limitation:
Concrete mixer requires proper maintenance and is difficult to clean. It requires power and is noisy. Using concrete mixer consumes more time.
f) Personal observation about the instrument:
Since mixing is done is done in machine, area is less untidy and cleaning is easy. Machine is moveable so concrete can be produced at various locations on site.
Compression testing machine:

a) Types:
i. Ranging from automatic or Semi-automatic
ii. Hydraulic controlled or servo-controlled. Designed to meet all standards requirements, BE, EN, ASTM.
iii. Our range of compression machines varies from 1500 KN up to 5000 KN compression capacity.
b) Purpose:
The compression testing machine is a very common testing method that is used to establish the compressive force or crush resistance of a material and the ability of a material to recover after a specified compressive force is applied and even held over a defined period of time.
c) Parts:
i. Screw rod
ii. Frame
iii. Piston
iv. Safety door
v. Oil tank
vi. Sensor
vii. Motor
d) Limitation:
Sometimes failure occurs at a joint in box. Non uniform distribution of stress and stain damage the machine.
e) Personal observation about the instrument:
Compression tests are used to determine a material’s behavior under applied crushing loads, and are typically conducted by applying compressive pressure to a test specimen.
Flexural Apparatus:

a) Types:
i. U type
ii. C type
b) Purpose:
The flexural test is used to test flexural strength of concrete beams, interlocking pavers, flagstones and blocks of different sizes.
c) Standards:
CONCRETE TILES: EN 491
CLAY TILES: EN 538
FLAT BLOCKS: BS 6073:1 app. C.
HOLLOW TILES: UNI 2107
CLAY FLOORING BLOCKS: UNI 9730–3
d) Parts:
i. Steel frame
ii. One upper bearer
iii. Two lower bearers
iv. Mechanical hand operated screw jack
e) Limitation:
Flexural tests are extremely sensitive and concrete columns are very heavy. The results are sensitive to specimen and loading geometry.
f) Personal observation about the instrument:
With ever increasing demand for high quality and reliable components and materials, flexural tests have become an important test method in both the manufacturing process and research and development to define a material’s ability to resist deformation under load.
Universal tensile machine:
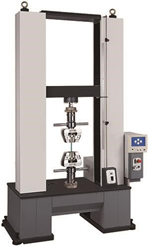
a) Types:
i. Servo hydraulic universal testing machine
ii. Hydraulic universal testing machine
iii. Automatic tension and compression machine
iv. Electromechanical universal test machine
b) Purpose:
UTM is used to measure the compressive strength and tensile strength of a material. It is capable of excerting tensile and compressive stress on a specimen.
c) Standards:
ASTM A370
EN 15630 3
UNI 7676
EN 50081–1
d) Parts:
i. Upper crosshead
ii. Space for tensile spaceman
iii. Movable Crosshead
iv. Space for Compressive spacemen
v. Table
vi. Load Indicator
vii. Speed control
e) Limitation:
A specimen cannot be tested at different temperatures. Since the test is destructive so the specimen gets wasted everytime.
f) Personal observation about the instrument:
One clamp holds one material and the other clamp holds the other materials. Then you pull them apart for a few inches. The force is measured up to 1000 times per second during the test and the average of all of the force readings are reported.
Small instruments:
Dial gauges (0.001mm):

a) Types:
i. Balanced reading Dial indicators
ii. Continuous dial indicators
iii. Reversed balanced dial indicators
iv. Reversed continuous dial indictors
v. Test dial indicators
vi. Plunger dial indicators
vii. Lever dial indicators
b) Purpose: They are used to accurately measure the minute lengths and displacements. They measure the distances compare to some reference unlike other instruments which measure the numerical values directly.
c) Standards:
B7503–1997
d) Parts of Instruments:
i. Cap
ii. Limit marks
iii. Hand/pointer
iv. Dial face
v. Bezel
vi. Stem
vii. Spindle
viii. Contact point
ix. Bezel clamp
e) Limitations:
Dial indicators typically measure ranges from 0.25 mm to 300 mm (0.015in to 12.0in), with graduations of 0.001 mm to 0.01 mm (metric) or 0.00005in to 0.001in (imperial/customary).
f) Personal Observations about the instrument:
These are precision measurement instruments with a clock-like face. They have numbers in circular pattern on which dial points to. There are numerous types depending upon sizes and functions.
Magnetic sand dial gauge:

a) Purpose and Standard on it works:
It is used to measure the precise value and works same as the dial gauge.
b) Parts of the instrument:
i. Snug
ii. Holding arm/rod
iii. Magnetic surface
iv. Adjusting screws
v. Supporting post
vi. Indicating pointer
c) Personal observation about the instrument:
This gauge is used the precise value of different materials.
Vernier caliper:

a) Types:
Vernier calipers are now available in digital vernier calipers which reduces error.
b) Purpose:
The Vernier calipers are used to measure the inner and outer breadth of rods and domains and thickness of any sort of object accurately.
c) Standards:
IS-3651
d) Parts:
i. Screw clamp
ii. Vernier scale
iii. Main scale
iv. Stem
v. Jaws
e) Limitation:
It can be used only for small objects. Accuracy is highly dependent on the user’s ability.
f) Personal observation about the instrument:
The vernier calipers found in the laboratory incorporates a main scale and a sliding vernier scale which allows readings to the nearest 0.02 mm.
Ultrasonic Pulse Velocity Meter:

a) Purpose:
It is used to determine the quality of concrete by generating ultrasonic pulses in the concrete and measuring the time taken by the pulse from transmitter probe to receiver probe in the material.
b) Standards:
NF P18–418
ASTM C597
BS 1881:203
c) Parts of Instruments:
i. Two 54 KHz transducers with 3 m cable
ii. Calibration rod
iii. Coupling agent (250 mm)
iv. Carrying case
d) Limitations:
The measurement is taken such that to measure the compressive strength, the material has to be destroyed.
e) Observations:
The measurements range from 0–3000 micrometer. With accuracy of 0, 1 micrometer. Its weight is 1, 3 kgs and can be used to determine the physical properties of materials.
Micro Cover Meter:

a) Purpose:
It is used to determine the rebel location, size and exact covers of concrete. b)Standards:
BS 1881:204
c) Parts of Instrument:
Cover meter
d) Limitations:
It can provide accurate measurements of depth only to about 80mm.
It cannot discriminate between closely spaced bars. It can only determine bar depths less than 60mm.
e) Observations:
It is an accurate measurement instrument which provides rapid area scanning of covers and measurement of bar size. It is light weight with a cover range of 185mm max.
Concrete Test Hammer:

a) Purpose:
It is used to measure the elastic properties or strength of concrete.
b) Standards:
ASTM C805
c) Parts of Instruments:
i. Body
ii. Latch
iii. Hammer
iv. Indicator
v. Plunger
vi. Spring
d) Limitations:
At first, it should be carried out on low strength concrete. The surface of concrete should be smooth.
e) Observations:
It is easy to use as it is light weight. It determines the hardness of in-situ as well as fresh concrete. It can locate the exact position of poor quality of concrete.
Material Bond Tester:

a) Purpose:
It is used to measure the bond strength of a material or the ability of the materials to stick together.
b) Standards:
ASTM A944
ASTM C1583
ASTM D4501
c) Parts of Instruments:
i. Hand operated puller
ii. 0–25kN Dual Scale Digital Gauge
iii. Adjustable alignment bond stool plate
iv. Bond Stool bush
v. 10 x 75mm diameter steel discs, 20mm thick
vi. 10 x 50mm diameter steel discs, 20mm thick
vii. Padded carrying case
d) Observations:
This advance and accurate measuring instrument is used in labs, workshops and construction sites. The disc of the instrument is attached with the testing material having a partial cut around the disc. After pulling the disc the pulled of strength of the material is determined.
Micrometer:

a) Types:
i. Outside micrometer
ii. Inside micrometer
iii. Depth micrometer
b) Purpose:
It is used to take precise linear measurements of objects such as dimensions, lengths and thickness.
c) Parts of Instruments:
i. C frame
ii. Spindle
iii. Thimble
iv. Anvil
v. Zero Adjust screw
vi. Sleeve
vii. Lock nut
viii. Ratchet
ix. Knurled gripe
d) Limitations:
Micrometers can measure the thickness to a limited range. For bigger objects multiple micrometers are required which will become expensive.
e) Observations:
It consists of a C shaped frame with movable jaws integrated by an integral screw. Fineness of the measurements depends upon the lead of the screw. It has a least count of 0.01mm.
Crack Detecting Microscope:

a) Purpose:
It is a precision apparatus which measures the crack width in concrete using an adjustable light source.
b) Standards:
i. BS 8110
ii. Parts of instrument:
iii. Eyepiece
iv. Rotating Knob
v. Adjustable Light source
c) Observations:
It has an adjustable light source needed in dark conditions. The image is focused by rotating the knob on the side. The eyepiece scale can be rotated through 360 degrees to align with the crack under examination.